
Improving CrossFit Open 24.1 (Part 1)
In this two part blog, we apply Training Think Tank’s philosophy and methodology to improving performance in CrossFitTM Open workout 24.1. Below you will find a long term approach to development of both general physical preparedness (GPP) and performance in the sport of CrossFitTM. We will elaborate using our academic and data driven approach to sport development. Part 1 will cover how we think about the movements that were tested in 24.1 and how to improve them over the long term. In Part 2, we will discuss how to refine these movement skills into athlete’s programs if you aspire to train CrossFitters.
Sport Performance vs. GPP
Before we get into our approach, we must first acknowledge that our opinion is that all people in CrossFitTM should not train the same way. If someone intends to build GPP, they are going to have a radically different approach to training than someone who is trying to be a competitive CrossFit Games athlete. For the competitor, training needs to change to become more intense. For GPP athletes, they need to learn how to better control their bodies in space before they start trying to lift heavy, move fast, and breathe hard in a competitive setting. As a result of this, Part 1 of this blog will cover the basics of moving well for the dumbbell power snatch and lateral burpees over dumbbell. Part 2 will cover strength, endurance, and sport-specific training to improve CrossFitTM Open workout 24.1.
Intro to the Workout
24.1 is…

HERE is TTT’s:
Improving Movement
If we look at this from the lens of GPP this test challenges a variety of positions and patterns. Someone needs to be able to comfortably bend over with loading, lift over their head, fall to the ground, get up from the ground, and lateral jump over a 6” object for 90 reps. If someone does want to do this safely as GPP, this means that athletes need to have the structural resilience and movement quality required to race these movements. If someone couldn’t safely run, you wouldn’t have them run a mile for time. Similarly, we wouldn’t have a GPP athlete do these movements in a ‘For Time’ setting unless they had the requisite base movement capacity in these skills.
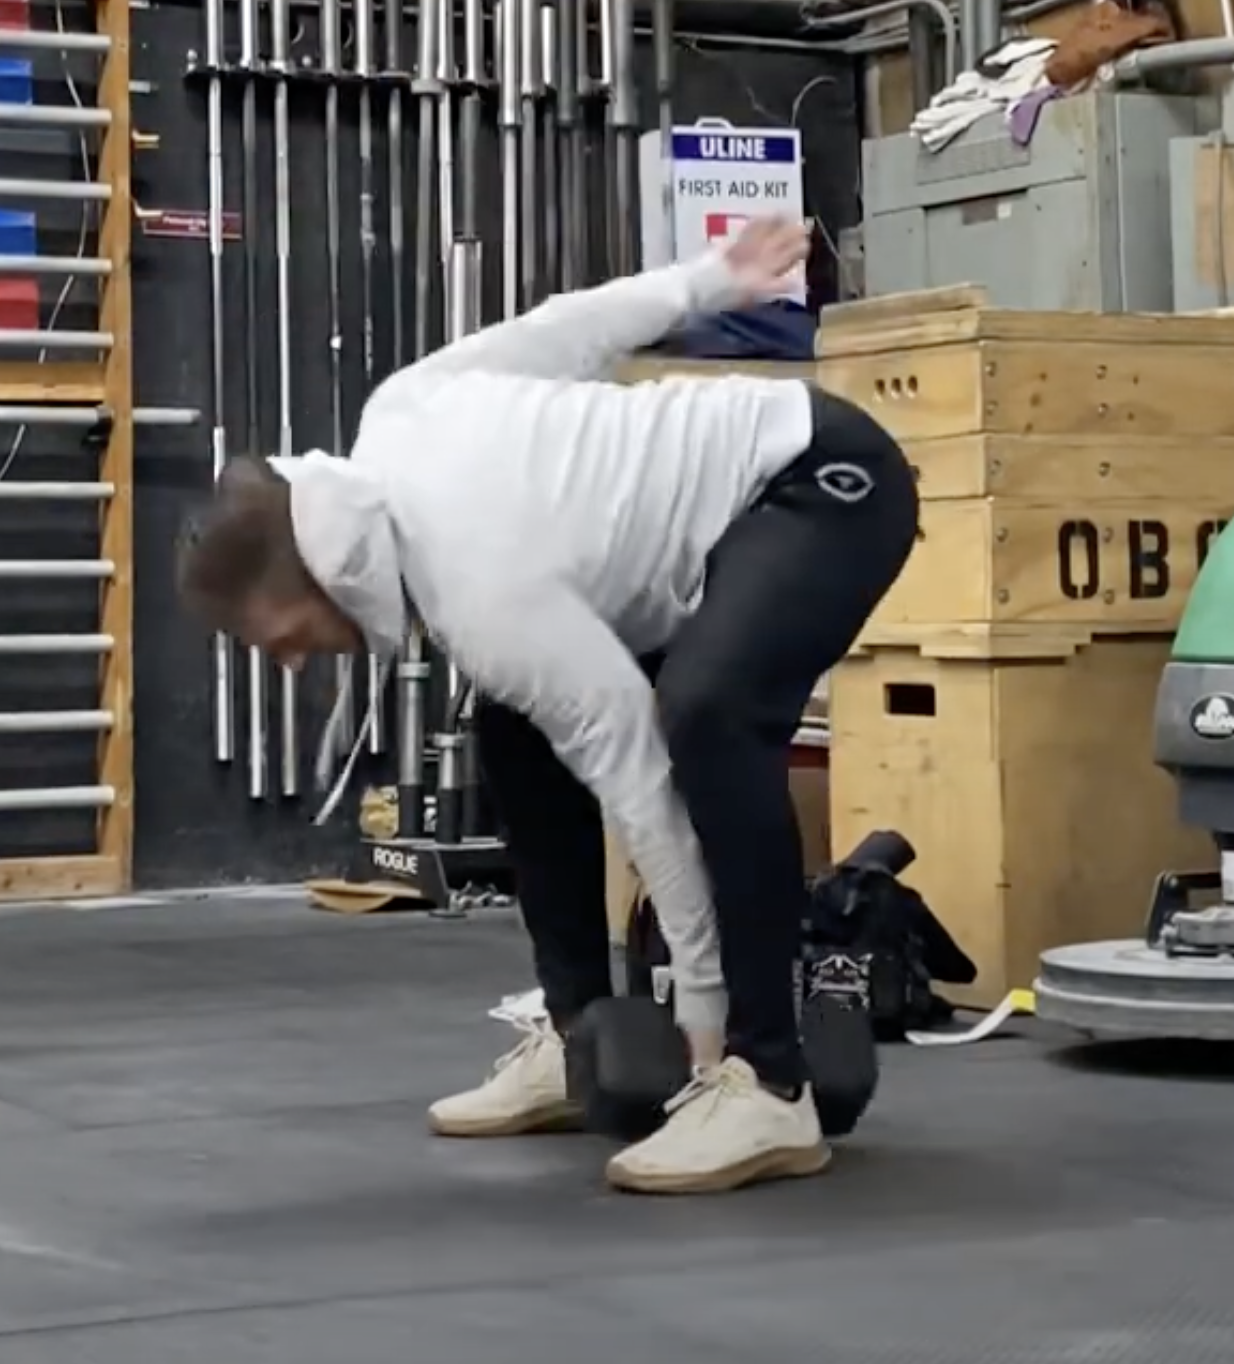
Lateral Burpee Over Dumbbell
For the lateral burpee over the dumbbell, there will be two different styles to use to maximize efficiency: (1) the jump-up burpee and (2) the step-up burpee. The use of each of the styles will be dependent upon your conditioning and ability to maintain your speed per rep which will be covered in the next two sections. From a movement efficiency standpoint, the majority of individuals will want to use the step-up style as it is less metabolically costly due to the decreased demands on the hip. On the other hand, the majority of elite athletes will be required to jump up to maintain a competitive movement speed. The jump-up burpee places a larger challenge on the hip and trunk. The compression needed for each movement can be tied into how well someone can breathe in those positions, less compression means more expansion and vice versa.

Jump-up Burpee

Step-up Burpee
The main improvements you can make for each of these styles is improving your client’s ability to flex their spine, hips, and improve their hamstring flexibility. Below is a table to show the movement demands for each burpee style.
Burpee Movement Requirements
| Style | What is Needed |
|---|---|
| Jump Up Burpee |
|
| Step Up Burpee |
|
Some movement training tools to improve these qualities could be:
Pelvic Tilts (movement awareness/breathing)
PNF Hamstring Stretch (loaded stretching)
Standing Pike Stretch (loaded stretching)
Ostrich Walk (flow)
Strength
Deficit RDLs (strength training)
Walking Lunge w/ Knee Drive (strength training)
*The bolded words are movement tools taken from the TTT Movement Course. To learn more, click here.
Dumbbell Snatch
For the dumbbell snatch, there are two different styles to maximize efficiency: (1) The dumbbell muscle snatch and (2) The dumbbell power snatch. Most people competing in CrossFitTM will use the muscle snatch technique as cycle speed is faster because it is relatively light. A mistake that is often made with the dumbbell snatch is forgoing any semblance of a hinge and flexing at the spine. For most, this will be inefficient and unsafe. We encourage a proper hip hinge in one of these two patterns which will require improvements in bilateral hip flexion, lumbar flexion, and hamstring length. One of the other main considerations with the high hinge style is the potential lower back fatigue that an individual will experience. If someone has a history of lower back pain, this could also exacerbate those symptoms.
High hinge DB snatch

Low hinge DB Snatch
The upper body requirements of the dumbbell snatch are shoulder flexion, scapular upward rotation, and some amount of thoracic rotation. Most clients can brute force their way through these patterns and steal motion from other places to fulfill the requirements of the movement. From a long term perspective, we want to make sure that individuals can maintain a stacked rib cage while getting into full shoulder flexion. If we can work on those two positions, the other motions should follow along.
(link to a video of shoulder stuff) https://www.youtube.com/shorts/YqpbYKxf2Yg
While the dumbbell snatch is a relatively low skill movement, there is much we can improve on from a movement efficiency standpoint if the end goal is a low cost smooth movement. The tools you would do this with would be:
Pelvic Tilts (movement awareness/breathing)
PNF Hamstring Stretch (loaded stretching)
Feet Elevated Breathing w/ Low Reach (breathing)
Single Arm Down Dog to Toe Touch to Single Arm Bear to Bridge (flow)
Supinated Grip Trainer Bar Pullovers (loaded stretching)
Shoulder Flexion PAILs/RAILs (end range isometrics)
*The bolded words are movement tools taken from the TTT Movement Course. To learn more, click here.
Dumbbell Snatch Movement Requirements
| Style | What is Needed |
|---|---|
| DB Muscle Snatch |
Lower:
|
| DB Power Snatch |
Lower:
|
Skill Acquisition
When teaching a new skill, you want to begin by showing the individual the whole skill so they understand the end result and then take components of the movement and teach them individually in a meaningful way. If you just train the individual pieces without understanding the end result, or what the intention is behind the individual pieces, then it’s going to be difficult for someone to understand why they are practicing broken portions of the skill. As a general rule for learning a new skill, you don’t want to over-cue or overcorrect someone. Below we will show example breakdown skill sessions for both the burpee and dumbbell snatch.
Lateral Burpee Over Dumbbell
Session 1 (Step-up):
A. Jump to Plank + Inchworm: 3 x 3, rest 30s.
B. Down Dog to Pop (slow): 3 x 5, rest 30s.
C. Mountain Climber w/ Pause: 3 x 4 per side, rest 30s.
*Pause with foot near hand and with hips up
D. EMOM x 4:
Session 2 (Step-up):
A. Jump to Plank + Inchworm: 3 x 3, rest 30s.
B. Down Dog to Pop (fast): 3 x 5, rest 30s.
C. Mountain Climber w/ Pause: 3 x 4 per side, rest 30s.
*Pause with foot near hand and with hips up
D. EMOM x 4:
*Session 1 / 2 for jump-up would be the same just changing movements to resemble a bilateral jump.
Dumbbell Snatch
Session 1:
A. Single DB RDL: 3 x 5 per side, rest 60s.
B. DB Strict Press to Eccentric Snatch Lower: 3 x 3 per side, rest 60s.
C. EMOM x 5:
3 DB Snatch per side
Session 2:
A. Single DB RDL: 3 x 5 per side, rest 60s.
B. DB Strict Press to Eccentric Snatch Lower: 3 x 3 per side, rest 60s.
C. 3-5 Sets:
30s Bike Erg @ low damper/high rpms
5 DB Snatch per side
Rest 45s
DB Snatch Movement videos:
Conclusion for Movement
Movement is the infrastructure which training is built on. It is being used to describe an individual’s ability to move their joints freely, express strength through range of motion, resist forces as they’re applied to the body, and adapt to new situations. An athlete’s ceiling can be dictated by their capacity to express their movement at speed, under load, or during high levels of fatigue. In Part 2 of this blog, we will discuss how to take this foundation and layer sports performance on top of it.
